CastLoom Pro setup & configuration guide
Follow the steps below to get everything working.
1. Transcription setup
Transcription runs locally on your machine, so you need to install the required dependencies first.
Step 1: Install Python (3.14 or latest recommended)
Download and install Python. Windows users: 64-bit installer; Mac users: macOS installer. During setup we recommend checking "Add Python to PATH" (Windows) so the command line can find Python. If the app still says Python is missing after install, try restarting CastLoom Pro or make sure python3 is on your system PATH.
Windows 64-bit: python-3.14.3-amd64.exe
Windows 32-bit: python-3.14.3.exe
macOS: python-3.14.3-macos11.pkg
Step 2: Choose and download a model
CastLoom Pro uses Faster-Whisper and supports several models. Pick one based on your trade-off between speed and accuracy:
| Model | Size | Speed | Accuracy | Use case |
|---|---|---|---|---|
| tiny | ~39MB | Fastest | Lower | Quick preview |
| base | ~74MB | Fast | Medium | Daily use |
| small | ~244MB | Medium | Good | Recommended default |
| medium | ~769MB | Slower | High | Higher quality |
| large-v3-turbo | ~1.5GB | Slowest | Highest | Professional |
Pick any model and click "Download model" in the app. Models are downloaded from Hugging Face.
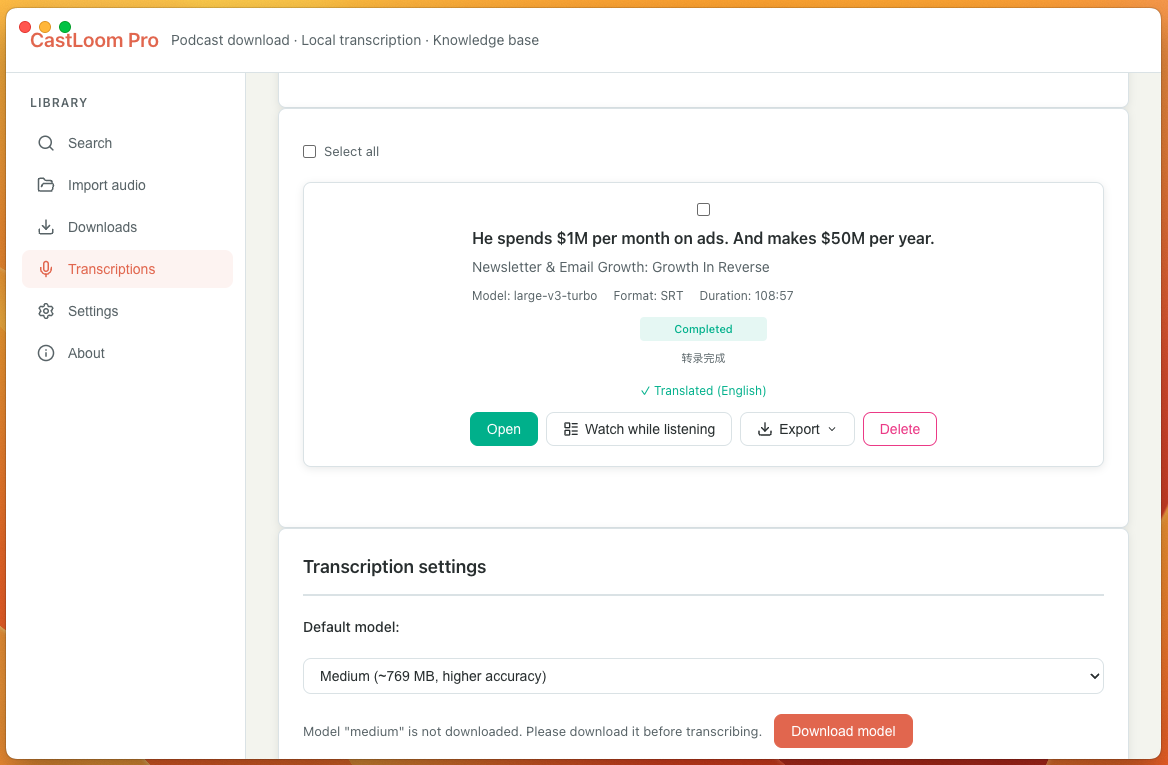
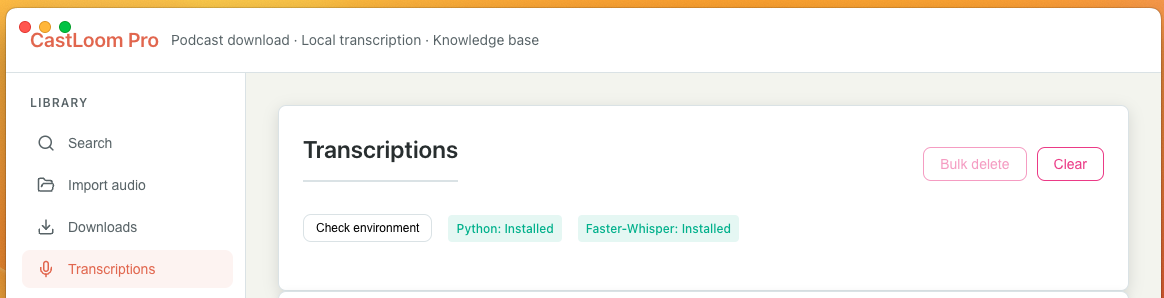
After the download finishes, open "Transcription tasks" and check "Check environment". If you see [Python: Installed, Faster-Whisper: Installed], you're good to use transcription.
2. Translation API setup
We support DeepL and OpenAI for translation. We recommend DeepL: the free tier gives you around 500,000 characters per month and the quality is great.
You’ll need a Mastercard or Visa to sign up. You can use a regular bank card or a virtual card — there are many options online.
Create an Integration and get your API key from the link below, then paste the API Key into CastLoom Pro settings and choose your target language.
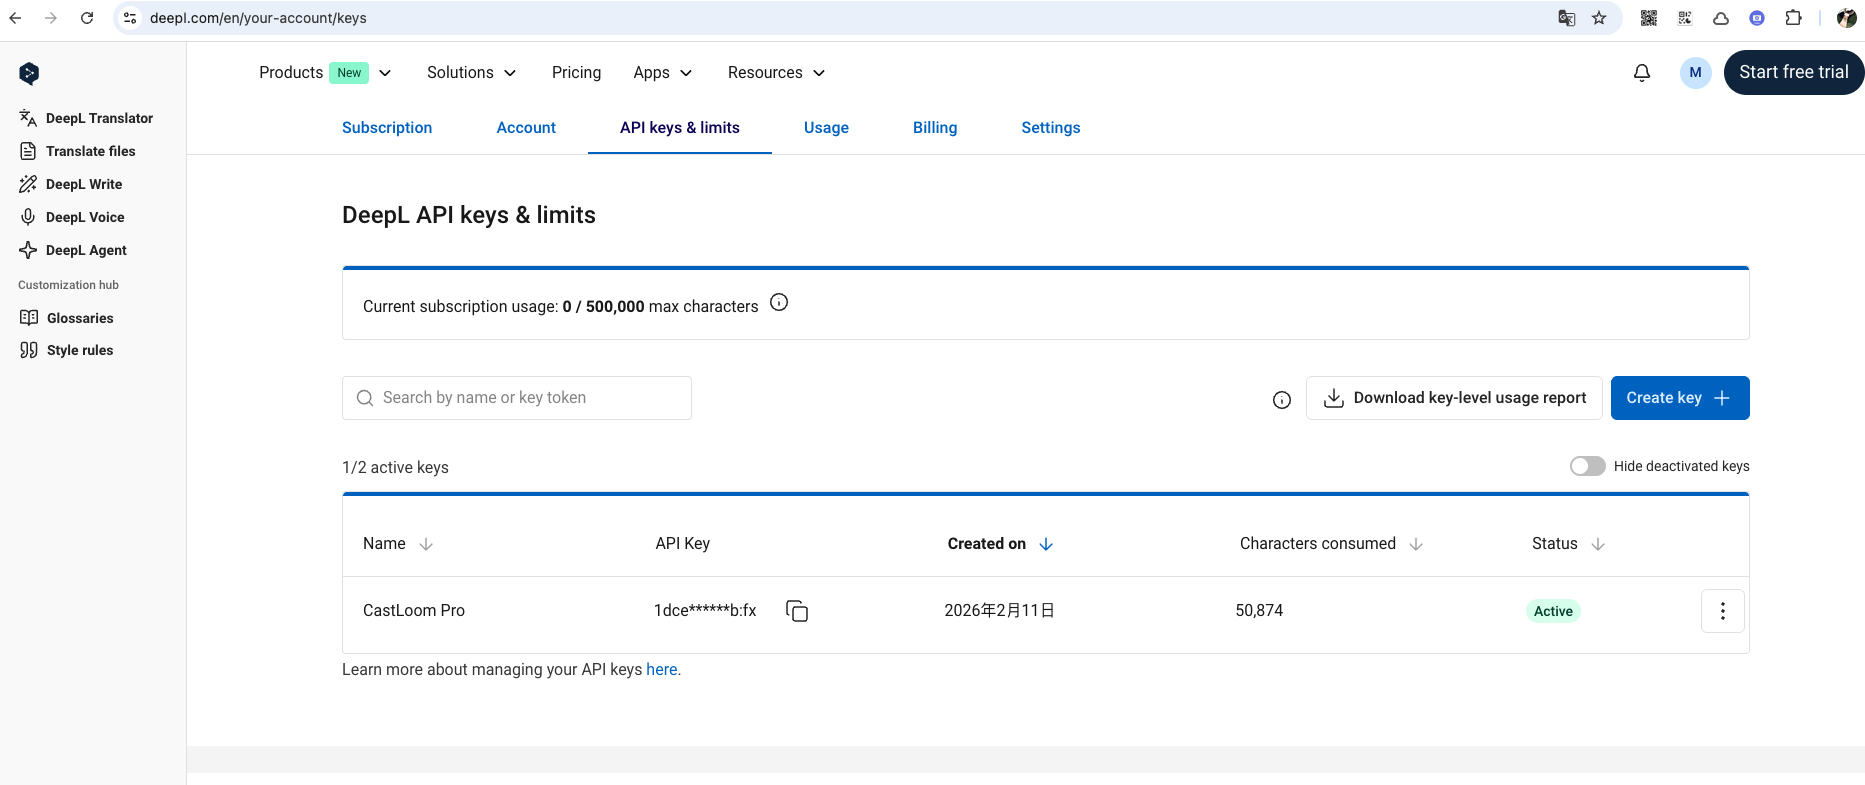
Paste your API Key in settings and select the target language.

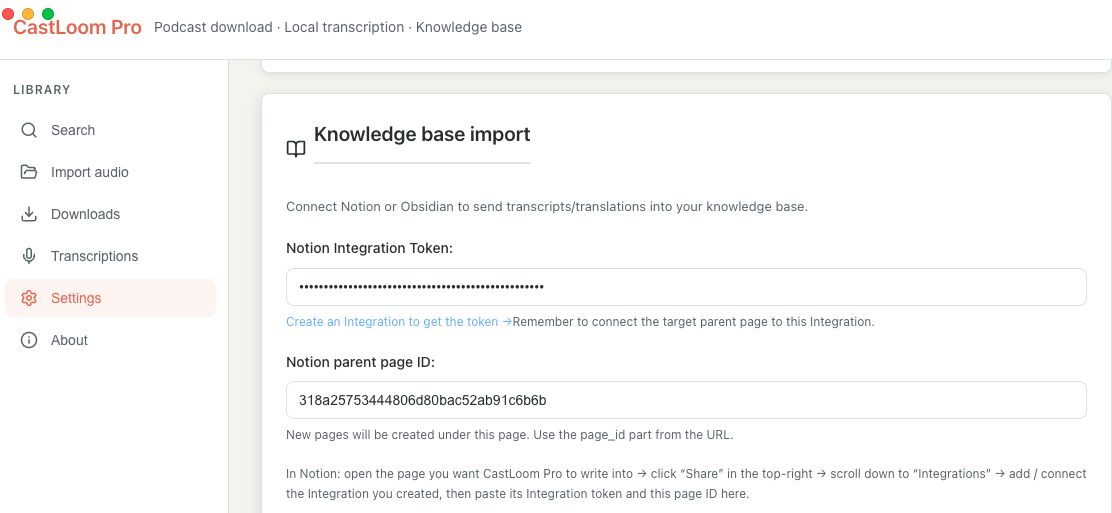
3. Knowledge base (Notion / Obsidian)
You can send transcripts or translations to Notion or Obsidian with one click. Set up one or both as you like.
Notion
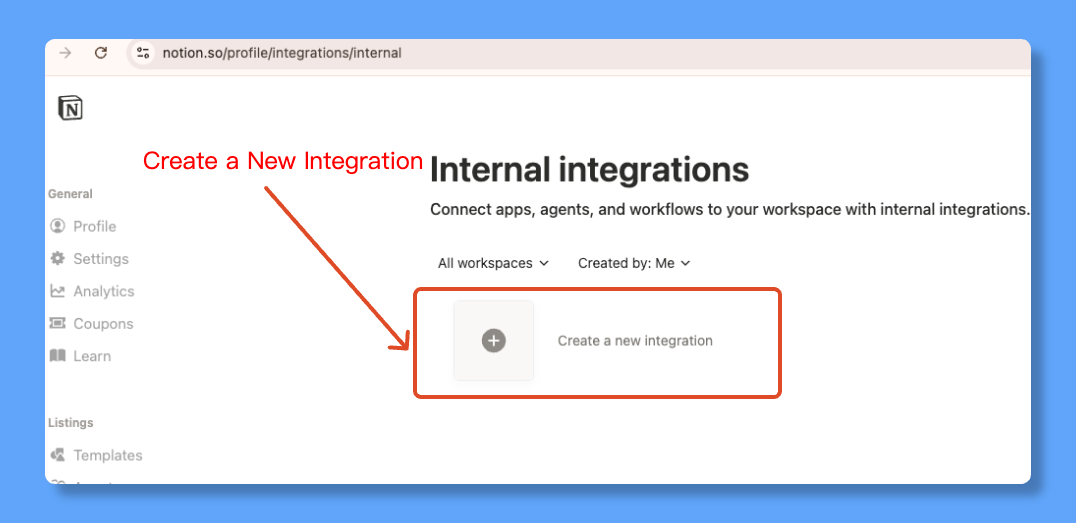
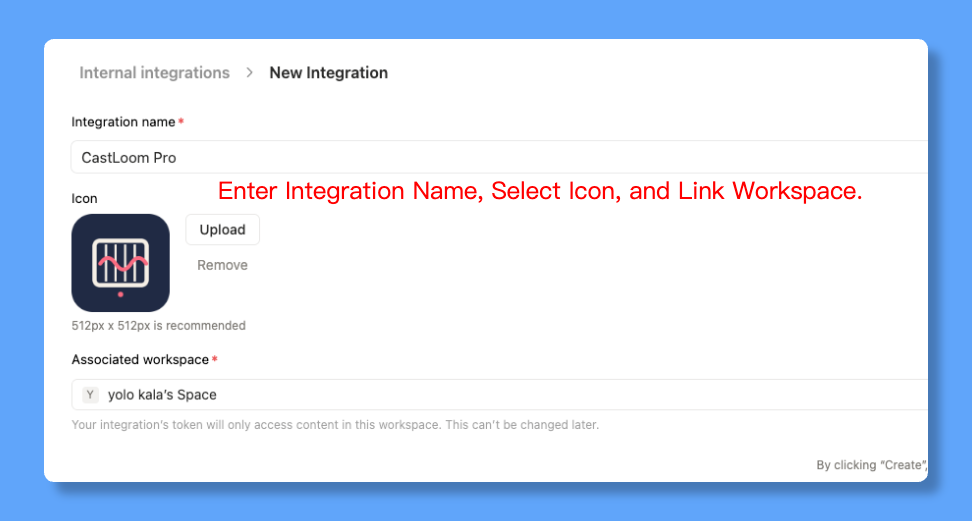
Step 1: Create an integration
Log in to Notion, open the link below, and click "New integration".
Step 2: Fill in the integration details
Enter a name, upload an icon, choose the workspace to link, then click "Create".
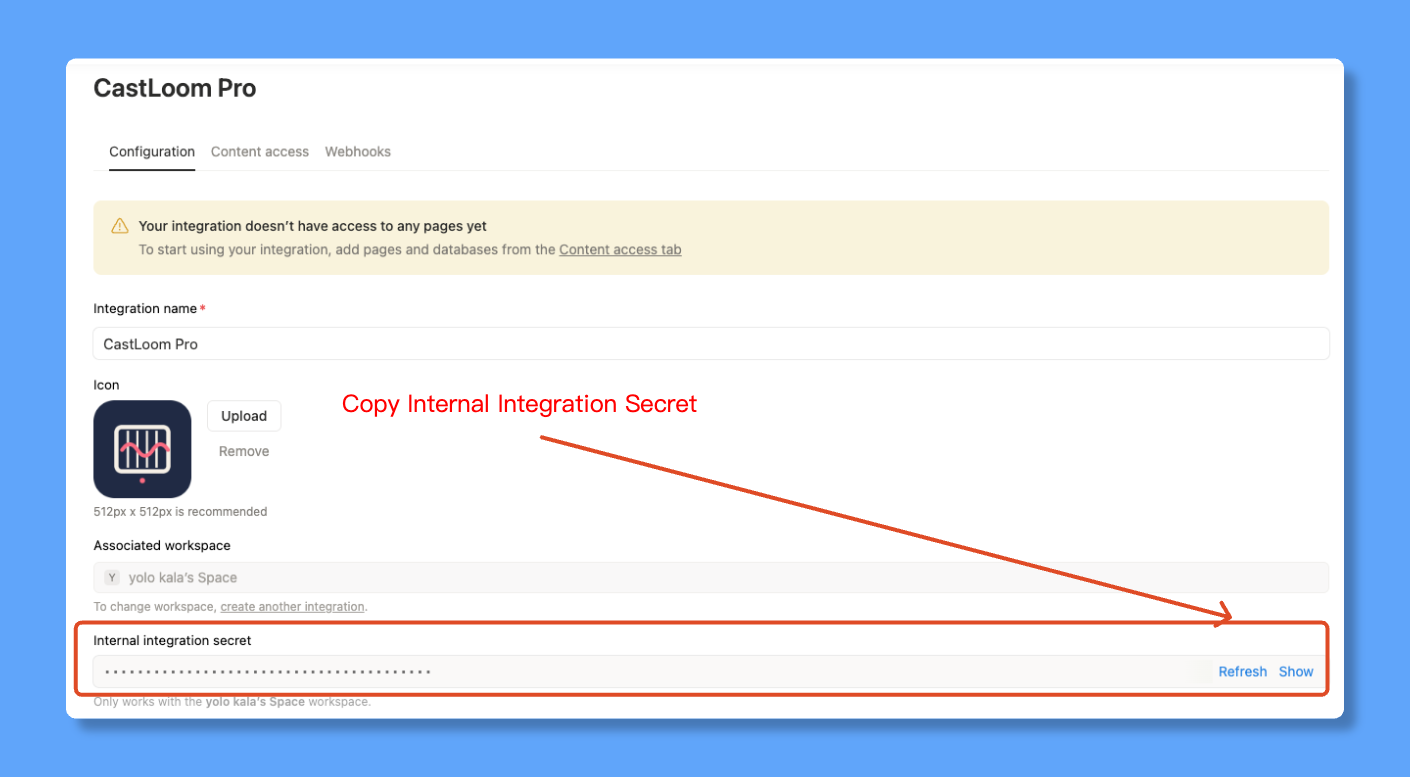
Step 3: Copy the API secret into the app
Copy the "Internal API integration secret" from the page and paste it into the "Notion Integration Token" field in CastLoom Pro.
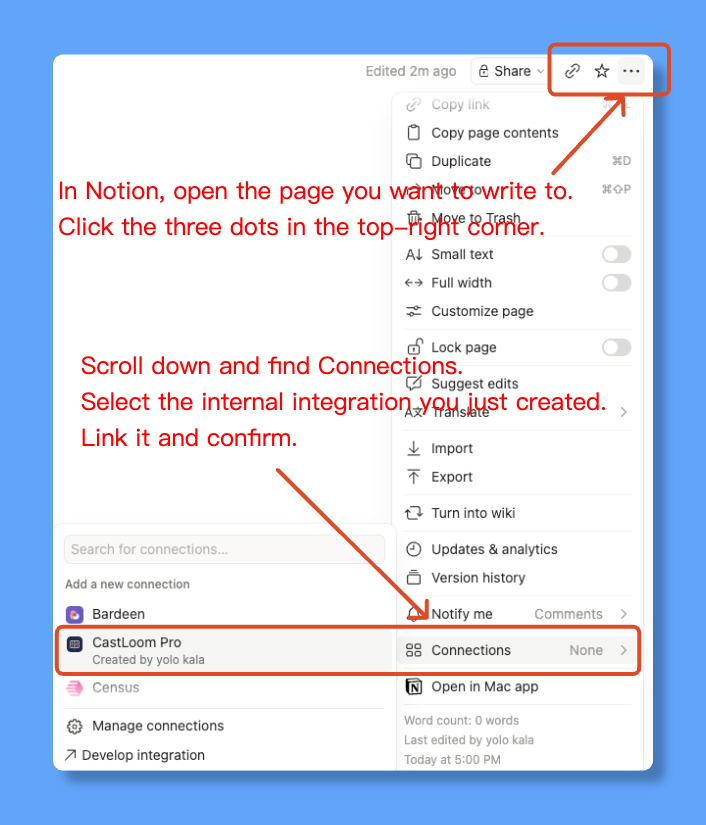
Step 4: Connect the integration to a page
In Notion, open the page you want to write to. Click the "⋯" in the top right → scroll to "Connections" / "Integrations" → connect the integration you created and confirm.
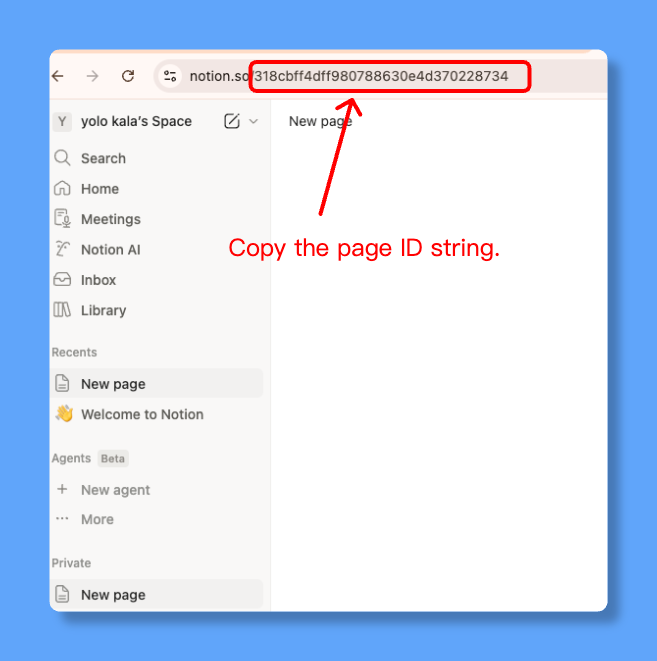
Step 5: Enter the parent page ID
The page URL looks like https://www.notion.so/318a25753444806d80bac52ab91c6b6b . The last part (e.g. 318a25753444806d80bac52ab91c6b6b) is the page ID. Paste that into "Notion parent page ID" in CastLoom Pro.
Obsidian
Obsidian stores everything locally, so setup is straightforward.
Choose your Obsidian vault path
In CastLoom Pro, select the folder on your computer where your Obsidian vault is stored.
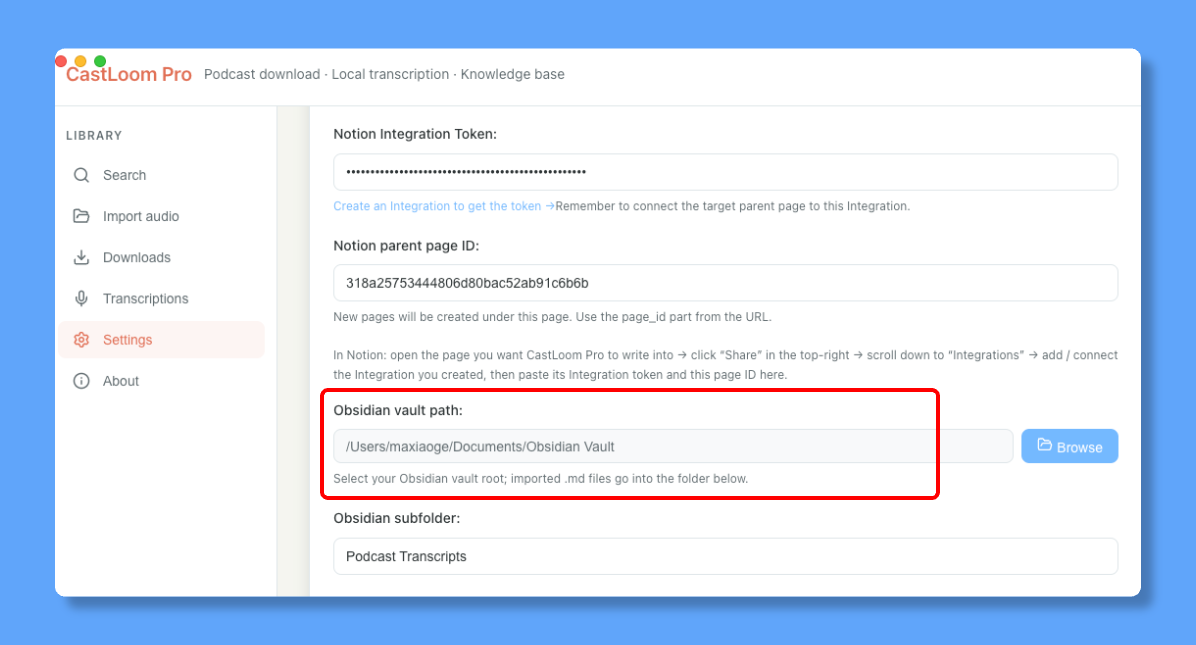
Tip: you can change the name of the subfolder used for imports in the app.